


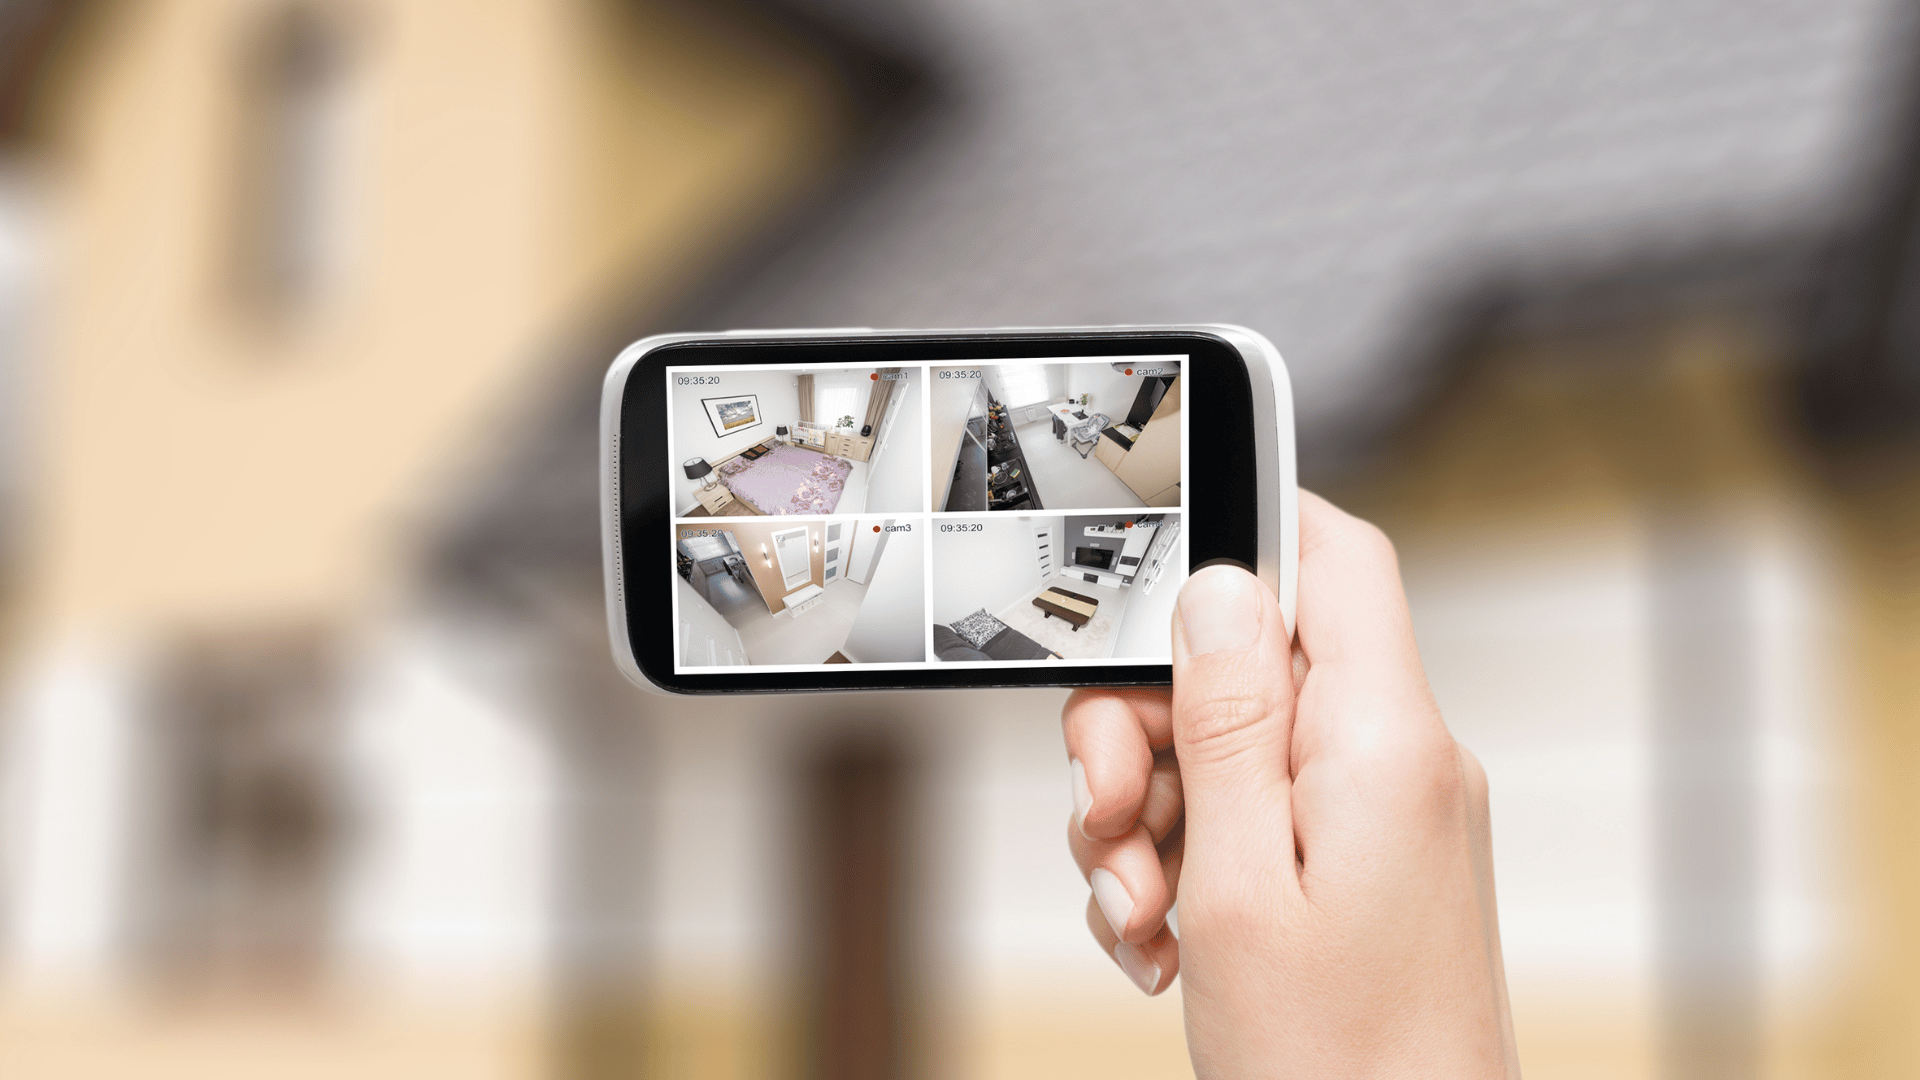
One of the most common questions our technical support team gets regarding CCTV systems is: which mobile app or software should I use to view my 2M Technology cameras? After all, what good are security cameras if you can’t even watch what’s being recorded? In this guide, we’ll provide you with all the information you need to monitor your cameras from any location, whether you’re on-site or off-site. We’ll go over your different viewing options, including which app or software to use with your specific 2M NVR model, and guide you through the process of connecting your NVR to the program.
Mobile App & Software List for 2M NVRs
The table below displays the different 2M Technology NVR models along with the corresponding mobile app and PC software they should be paired with.
| Model | Mobile App | PC Software | Software Download Link | Web Browser Accessible |
|---|---|---|---|---|
| 2MN-7XXX Series, Older 2MN-8XXX Series |
Guarding Vision | |||
| 2MN-8004-P4, 2MN-8008-P8, 2MN-8116-P16, 2MN-8232-P16 |
2M Guard | 2M Station | Windows MAC |
✓ |
How to View Cameras with Mobile App
Using a mobile app to access your NVR offers convenience and enables you to monitor your premises at all times, even when you’re away from the site.
2M Guard
2M Guard is the mobile app through which you can add your 2M Technology NVR to view your cameras remotely. 2M Guard works with the following NVR models: 2MN-8004-P4, 2MN-8008-P8, 2MN-8116-P16, 2MN-8232
First, find the Register Code and/or QR code for your NVR. You can do this by navigating to:
- On NVR menu: Menu > System > Network > P2P OR Menu > Network > P2P
- On web menu: Setup > Network > P2P
You will use the Register Code and/or QR code to add your NVR to the 2M Guard app. You have two options for adding your NVR: through Star4Live or directly within the app.
Method #1: Adding NVR Through Star4Live
- Go to https://www.star4live.com/login
- Click on Login if you already have an account, or choose Sign Up to create one.
- After logging in, click on Add. A new window will pop up, prompting you to input the Device Name and Register Code. Fill out the information and click OK. Your device will then be listed under My Cloud Devices.
- Once you have successfully added the NVR on Star4Live, open the 2M Guard app and log in to your account using the same credentials you created/used on Star4Live.
- Go to Live View and tap the icon in the upper-right corner to select a device.
- Select the NVR you just added and click Start Live View.
Method #2: Adding NVR Directly On the App
- Download the 2M Guard app. Login if you already have an account or click Sign Up to create one.
- Once logged in, open the app menu and select Devices. This will display all the devices added to your account. To add your NVR, tap on Add at the top of the screen.
- Tap on Scan. On the next screen, you can add your NVR either by scanning its QR code with your phone or manually inputting the Register Code by tapping on the edit icon at the bottom.
- Fill out all the information and press the save icon in the upper-right corner.
- Open the app menu again and click on Live View.
- The windows will initially be empty, so we need to add cameras to the live view. You can do this by tapping on the add icon in the upper-right corner.
- A list of your devices will then appear. Select the NVR you just added and tap on Start Live View at the bottom.
How to View Cameras with PC Software
2M Station
If you’re viewing your cameras using a computer, you can install 2M Station for both on-site and off-site monitoring. 2M Station works with the following 2M Technology NVR models: 2MN-8004-P4, 2MN-8008-P8, 2MN-8116-P16, 2MN-8232
- Download 2M Station. You can find the download link in the table above.
- When you first run the program, you will be prompted to log in using the default username admin and password 123456. It is recommended to change the password after installation.
- Once logged in, go to the Device Management tab to add your NVR.
- Select Encoding Device under the Device tab on the left side.
- The bottom of the screen (Online Device) will display any devices that are online as long as the computer is connected to the same network as the devices.
- Add your NVR using one of the three methods explained below.
- Once your NVR has been successfully added, the next step is to add your cameras to the live view. To do this, go to the Control Panel tab of the menu and click Live View.
- On the left side of the window, you’ll see a list of online devices. Click and drag the NVR onto the live view screen to load all camera views.
- If you don’t want all of the cameras in the view, click on the plus sign next to the device name to show the list of cameras connected to the NVR. From there, you can drag specific cameras onto the live view screen.
Method #1: Adding NVR Automatically
- Check the box for the NVR that shows under Online Device.
- Then, click Add.
- Follow the rest of the main instructions to add your cameras to the live view.
Method #2: Adding NVR Manually
- Click on Add next to Managed Device. This will open another window where you input the details of your NVR. It will ask for: Device Name (can be any name for your NVR), IP/Domain (local or public IP address of NVR), Port (port number of NVR), Username (username of NVR), and Password (password of NVR).
- After entering all the information, click on Add. The NVR should come online.
- Follow the rest of the main instructions to add your cameras to the live view.
Method #3: Adding NVR By P2P
The P2P method allows the user to view their cameras offsite from any location.
- Refer to step 4 of the main instructions. Instead of selecting Encoding Device, choose Cloud Device.
- The next screen will prompt you to Login to your Star4Live account. This will link your account to the program and display the devices you’ve previously added to your Star4Live account.
- After logging into your Star4Live account, it will take a few minutes for the devices to show online.
- Follow the rest of the main instructions to add your cameras to the live view.
How to View Cameras with Web Browser
If you prefer not to download a mobile app or software, you can access your NVR through a web browser. This works with the following 2M Technology NVR models: 2MN-8004-P4, 2MN-8008-P8, 2MN-8116-P16, 2MN-8232-P16
- Make sure that the computer you’re using is connected to the same network as the NVR, meaning they’re both connected to the same router.
- Find the IP address of your NVR by navigating to Menu > System > Network > IPv4 address.
- Take note of the IP address.
- Open Internet Explorer on your computer (please note that this will not work with other web browsers).
- Enter the IP address of your NVR into the address bar.
- You will be redirected to the login page of the NVR. Sign in using the same username and password that you use to log in on the device.
If you are getting an error (i.e., “Cannot be reached”, “Cannot be found”), it can mean a few things:
- The NVR is not connected to the network.
- The computer is not connected to the network.
- The NVR and computer are not connected to the same network.
- You need to add http:// to the beginning of the URL (e.g., http://192.168.0.100).
- Your physical network connections (network cables) are not secure.
Contact 2M Tech Support for Inquiries
We hope that this guide helped with the setup of your camera viewing. If you have any questions or need assistance with installation or troubleshooting, reach out to our technical support specialist at +1 (214) 988-4302 or at ana@2mtechnology.net.