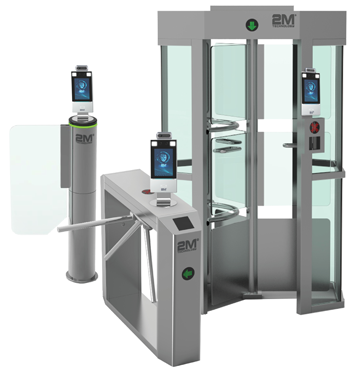
With 2M Technology’s 2MTHFR-2M/2MWTK access control terminals, you can customize your access control system according to your needs. Access control isn’t a “one size fits all” solution, and with our terminals, you can configure various access control setups for different user groups. In this guide, we’ll show you how to use a check template to set up a tailored access control method for each user in your organization.
How to Use & Set Up the Check Template
Before setting up the check template, consider how you intend to use it and who it will be for. Determine whether you’ll use the check template to set different access times, authentication methods, or both for each user. This will help you decide how many check templates to create and which users should be assigned to each template.
1. Create a Check Template
You can create up to 16 check templates, whether for each shift, department, or level of access. Just remember that each check template applies to all users assigned to it, so if you have a user or group needing different access times or authentication methods, you’ll need to create a separate check template for them.
- Access the web page of the terminal by entering the terminal’s IP address, which is located in the lower-left corner of the screen, into the search bar of Internet Explorer.
- Log in using the password you created when you first set up the terminal.
- Go to Setup > Intelligent > Check Template/Auth Schedule.
- Assign a Template Name so it’s easily identifiable. For instance, you might indicate if it’s intended for employees of a specific department.
- Set the time ranges for each Time Interval. You can configure up to eight time intervals per day. **NOTE: The time intervals must not overlap on the same day (e.g., Monday cannot have Time Interval1: 08:00:00 – 11:00:00 and Time Interval2: 10:00:00 – 11:00:00).
- Select an authentication method for each time interval using the dropdown list on the right side. You can choose from Card, Face, Password, or Card + Face. **NOTE: To use both card access and face recognition, select Card + Face. Do not choose Card and Face separately. When multiple authentication methods are selected, they operate with an “OR” condition, meaning access is granted if either Card OR Face verification is successful.
- Repeat these steps for each day. You can create different time schedules with different authentication methods for each day. To set the same schedule and authentication method for every day, check the Select All box next to Copy To at the bottom of the template, then click Copy.
- Save the template.
2. Assign the Check Template to a Face Library
Once the check templates have been created, the next step is to assign each template to a specific face library. A face library represents a group of authorized users, and you can have up to 16 face libraries. Although a check template can be assigned to multiple face libraries, keep in mind that the access times and authentication methods specified in the template will apply to every user in the assigned face library. Therefore, you’ll need to create/have at least one face library for each check template you have.
- From the web page of the terminal, navigate to Setup > Intelligent > Face Library.
- If you already have a face library, select it from the list on the left and click Edit. On the following screen, choose the correct template from the dropdown list by Check Template, then click OK to save your changes.
- To create a new face library, click the Add button located above the list of face libraries on the left. Select the Face Library Type, enter a Face Library Name, and choose the appropriate Check Template. Click OK to save the new face library.
3. Add Users to the Face Library
After creating all the necessary face libraries, the final step is to add users into their respective face library. Once all users have been added to their designated libraries with the assigned templates, they will only be able to enter during their specified time frame using the specified authentication method.
Single Upload Instructions:
- From the web page, navigate to Setup > Intelligent > Face Library.
- Select the face library you wish to add the user to from the list on the left.
- Click the Add button on the right side of the face library list.
- Fill in the user’s information on the Add Face Info page. Number and Name are required fields. If you’re using face recognition, upload a face photo for the user. If you’re using card access, enter their Card Type and Card Number. Complete all the fields if using both.
- Click OK to save the user.
Batch Upload Instructions:
- Download the batch import template by going to Setup > Intelligent > Face Library > Export Template.
- Unzip the file to access the template, which is a .csv file.
- Create a copy of the file for each face library.
- For each template, fill out the necessary fields for each user. Number and Name are required. If you’re using face recognition, provide a face photo by entering the file path and file type for the image (e.g., C:\Users\Public\Pictures\employee.jpg). If you’re using card access, enter each user’s Card Type and Card Number. Complete all the fields if using both.
- After completing the templates, return to the web page and navigate to Setup > Intelligent > Face Library.
- Select the face library where you want to add users from the list on the left, then click on Batch Import.
- Choose and upload the completed file.
- If any uploads fail, the terminal gives you the option to export the Failure Import Information Record. This record shows which users failed to import and provides an explanation for the failure.
- Upload the remaining templates to their designated face libraries.
Questions? Contact Our Technical Support Specialist!
With a check template, you can control when and how each user gains entry through our access control terminals. This flexibility lets you tailor your access control measures according to your security needs and user roles. We hope this guide has helped you understand how to use and set up check templates, but if you have any questions, don’t hesitate to reach out to our technical support specialist. You can contact them at +1 (214) 988-4302 or at ana@2mtechnology.net. For additional information and tutorials, check out our Knowledge Base linked below.
